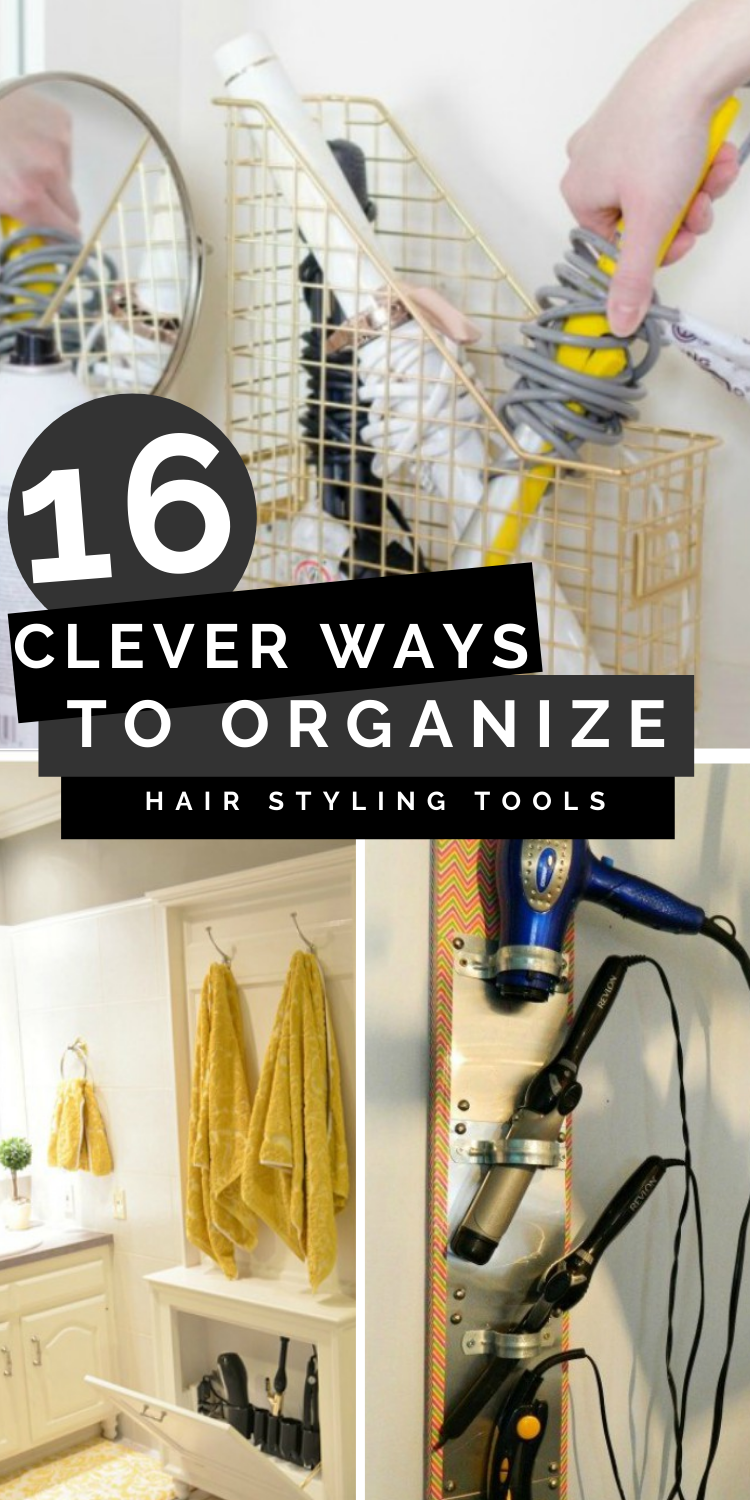
Bathroom Hair Appliance Organizer
If you're feeling inspired to spring clean, one easy afternoon project is to come up with a way to organize hair styling tools in the bathroom.
Reaching for my flat iron, curling iron, or hairdryer in the mornings is like reaching into a mystery grab bag… I never know what I'm going to pull out. My hair styling tools are so unorganized! So, in my search for ways to get them under control, I've found 16 totally clever ways to organize hair styling tools. From repurposing a file box or magazine holder to building your own custom organization station, you'll find a way to tidy up your tools and get your bathroom or vanity organized here.
Clever Ways To Organize Hair Styling Tools To Make Getting Ready Easier
When I'm getting ready in the morning or to go out in the evening, I don't want to deal with tangled-up cords or styling tools that are all over the place. It's even worse for people who have a small bathroom without much counter space. So here are some simple fixes to help you turn the tangled mess in your bathroom into organized bliss with some style.
1) Add a Magazine Holder to Your Vanity
Attach a pretty metal or brightly colored magazine holder that matches your decor to the wall or to the inside of a cabinet to hold your hairdryer, flat iron, and curling irons. Be careful using plastic if you plan on putting hot styling tools in before they are fully cooled. Such a simple idea that doesn't cost much money, but brilliant! Just peak inside to grab and go.
How do you wrap a hairdryer cord?
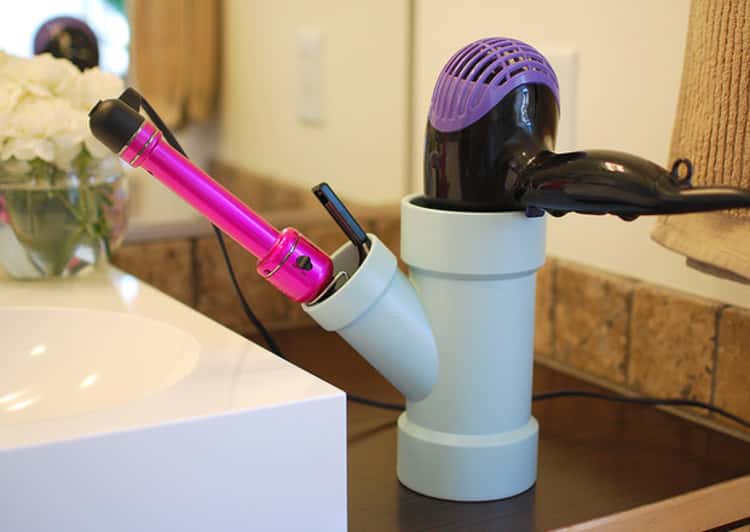
2) Painted PVC Pipe Keeps Styling Tools in Reach
PVC is an inexpensive material that's easy to cut, paint, drill, glue, and create with. Make your own affordable hair styling tool stand out of PVC pipe to corral that bathroom chaos. This quick PVC project doesn't have any complicated instructions. Just get a Y-shaped PVC connector piece, then decorate it with spray paint and glue some fishing weights to the inside bottom to keep it stable. It's super easy, and it's functional.
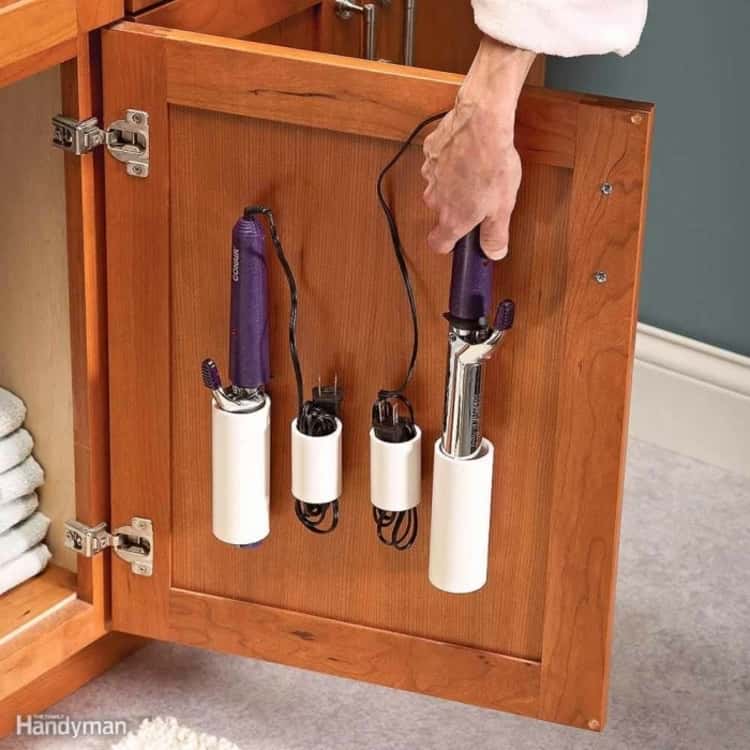
3) PVC Pipe Project Part 2
You can also attach pieces of cut PVC pipe to the inside of a bathroom base cabinet or under the sink to create PVC curling iron holsters for all your different-sized irons. I know I have several! You can also use contact paper or spray paint to make them look even cuter.
4) Build A Custom Storage Cabinet
One family built a hair organizing station that's simply brilliant. Towel hooks are placed above, and the hair tools are hidden away until they're needed. What's even better is that there is an extra outlet hidden inside to plug all your styling tools in. A girl can never have enough outlets! There's even a cute little shelf to rest the curling iron on. This is a great way to free up counter space and cabinet space too.
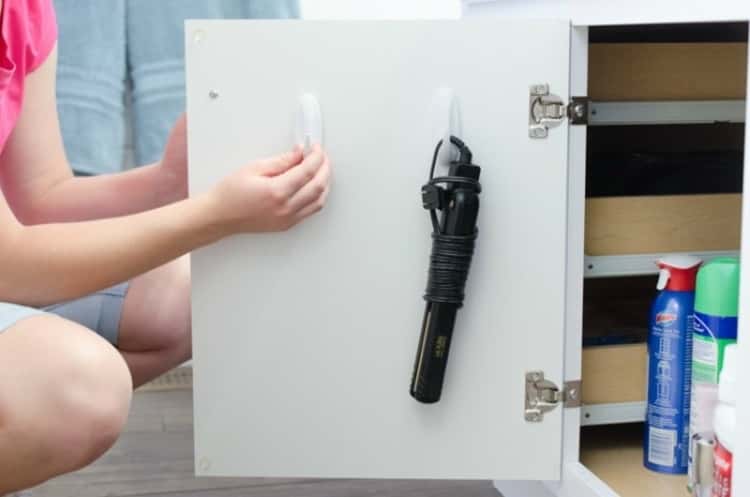
5) Use Command Hooks on the Inside of Cabinet Doors
Another easy idea is to hang your hair styling tools on the inside of your bathroom cabinet using minimal space by making use of command hooks. Adhere command hooks inside your cabinet doors or on the side of a cabinet or vanity to hang your tools within reach. This is a great idea if you are renting or can't make permanent changes to the bathroom.
Aren't command hooks the handiest things ever?
How do you keep tool cords from tangling?
6) Desktop File Boxes Give Peace of Mind For Hot Tools
If you are super anxious about the curling iron or straightening tool causing a fire, then this is an idea for you. Leaving your hot tools out on the counter isn't a great idea when you don't have a lot of counter space. And it just looks all messy and cluttered. Hang a metal file box on the side of the vanity to house those hot tools while they cool and give yourself some peace of mind. This storage idea would look perfect with rustic, contemporary, or industrial-style decor. I'm going to try this in my bathroom!
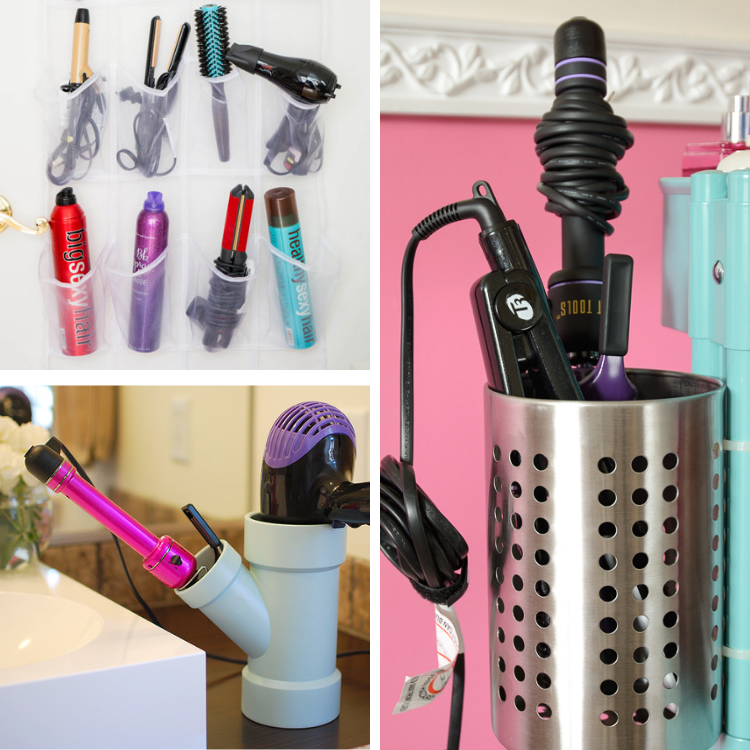
7) Try This Hack With a Clear Hanging Shoe Organizer
Add a hanging shoe organizer to the back of your door for hair sprays, brushes, and small hair tools. This nifty trick allows you to keep your tools hidden behind the door when not in use. But you can see everything you have and they are easily accessible when the door is closed and you are getting ready. What a great way to hold those big brushes and large bottles of product that may not fit somewhere else.
Look up all the smart ways you can use hanging shoe organizers in other rooms of the house beside the bathroom.
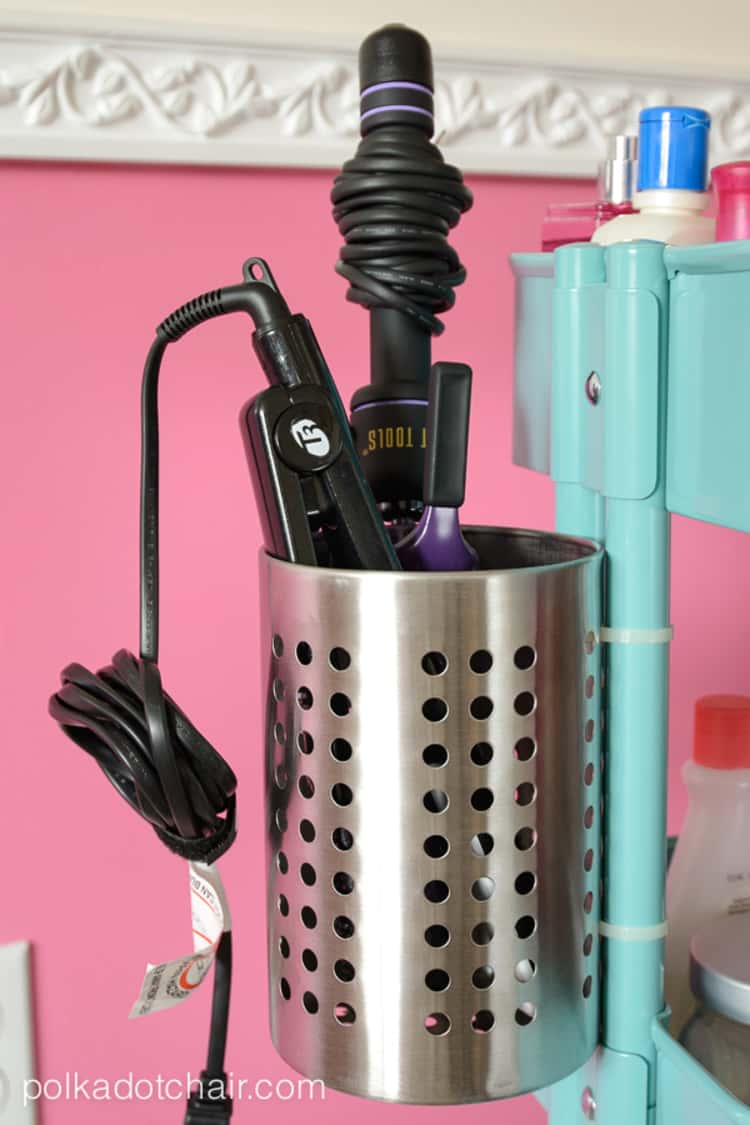
8) A Handy Container for Hot Tools
This stainless steel utensil holder is a smart choice because you can definitely put your tools in them when they're still hot. Plus it looks clear and stylish enough that you can keep it out. And it's easy to clean stray hairs or residue because you can rinse with soapy water or put it in the dishwasher. It's attached to a Raskog cart from Ikea that can be rolled around even to another room where there's a mirror… we absolutely love the carts, too!
9) DIY Wooden Boxes to Organize Hair Styling Tools
Add small paint cans to a wooden box to recreate this easy peasy DIY hair tool organizer. It's small enough to fit on the back of the toilet in a half bath or if counter space is limited.
Here are the materials you'll need to build this simple box:
- 2'x4′ sheet of 1/4″ MDF
- 1/2″ square dowel
- Decorative moulding
- Empty quart paint can/soup can
- Wood glue
- Wood putty
- Sandpaper
- Primer/Paint
- Helpful tools: Clamps, Saw, Brad Nailer
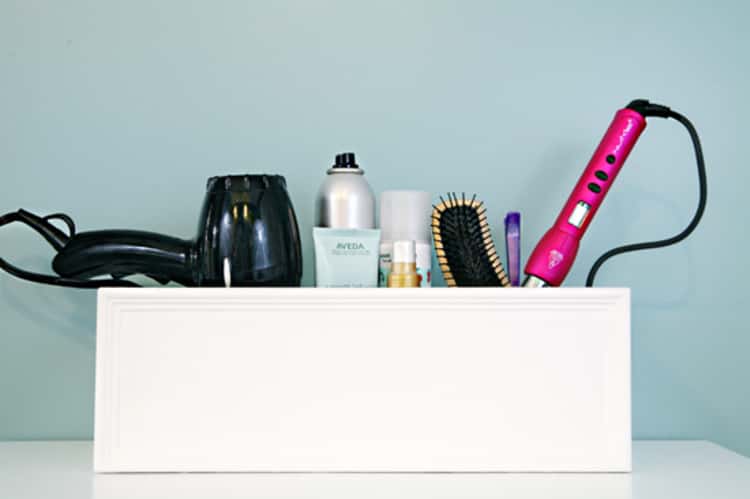
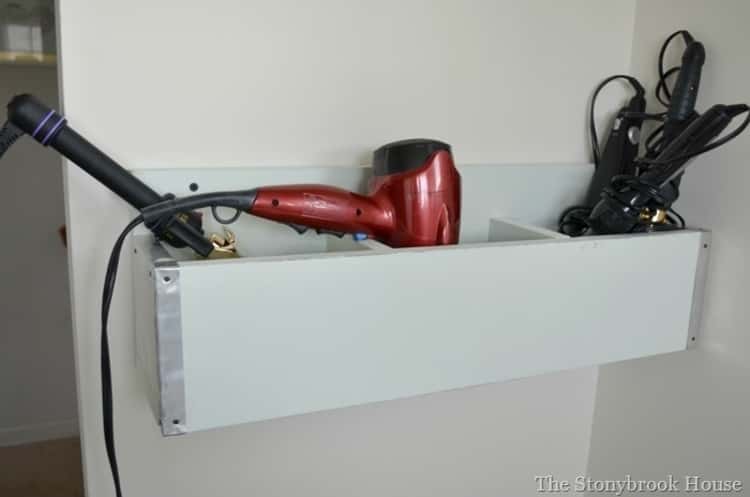
Or try out this variation on the wooden hair tools organizer. It's simple to create, with just three compartments, and you can attach it to the wall above the sink or below a towel bar for easy access.
10) Reduce, Reuse, Recycle in the Bathroom
One idea is to make a hairdryer caddy out of an old plastic bottle. This is especially good if you have a larger or heavier dryer because you hang it on sturdy over-the-door hooks. There's an idea I would never have thought of!
11) Tried and True Bathroom Storage with a Woven Basket
Do you know what never fails? Basket hair tool storage. Seriously, you need a couple of baskets in every single room to keep things tidy. Make sure you get hooks that can hold up to one pound or more in weight.
12) Upcycle a Pencil Holder To Store Your Flat Iron
Attach pencil canisters to the inside of your cabinet. You probably have one or two lying around, anyway (if you're an office supplies addict like me).
13) Different Sized Curling Irons…No Problem!
A rolling pin organizer is perfect for those who have curling irons in several different sizes. (Unsure of the original source. If the idea is yours, let us know so we can link to you!)
14) Use This Heat-Safe Way to Organize Hair Styling Tools
Make a vertical hair organizer out of a wooden board, some flashing, and pipe clamps. The flashing keeps it heat-safe, so you don't have to wait for the tools to cool before you store them.
15) Hang All Your Styling Tools in One Place
Sometimes you don't have a vanity cabinet to store all your hair styling stuff in. So that's when you have to get creative and use the walls. Turn cute pails into a hanger organizer for your styling and beauty tools.
More Organizing Ideas For The Bathroom
Organizing your hair styling tools is just the beginning! Go into full-on organizing mode with these easy tips to organize the entire bathroom:
- Declutter First.
- Keep the Counters Clutter-Free.
- Use the Inside of Cabinet Doors for Storage.
- Use drawer dividers.
- Have a Caddy for Each Member of the Family.
- Add a laundry bin.
- Hang towels from hooks instead of towel bars.
- Use clear acrylic containers.
Check out these DIY hacks and tricks that you can use to declutter and organize more things in your bathroom to make it functional and stylish.
- 9 Brilliant Bathroom Organizing Ideas to Declutter
- 15 Ways to Organize Under the Bathroom Sink
- DIY Bathroom Tips and Organization Ideas
- 15 Ways to Store Bath Toys and Magically Declutter your Bathroom
- 15 DIY Towel Holders to Spruce Up Your Bathroom
Bathroom Hair Appliance Organizer
Source: https://www.onecrazyhouse.com/organize-hair-styling-tools/